Second Learning


Lesson 15: Changing Clothes in Public Without Nudity

All Pictures in this blog entry were taken at Dream Gardens Arboretum. A location with, as my mom would say, "Pretty peeps." Visit them and help their traffic numbers!

Have you ever been in the position where you suddenly realize that you need to change clothes? Is it somewhere that you cannot chance even the slightest moment of nudity (which may happen if you just drop a folder onto your avatar)? For example, a PG sim filled with AR-happy individuals? Then I've got the answer for you.

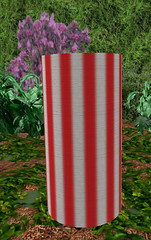
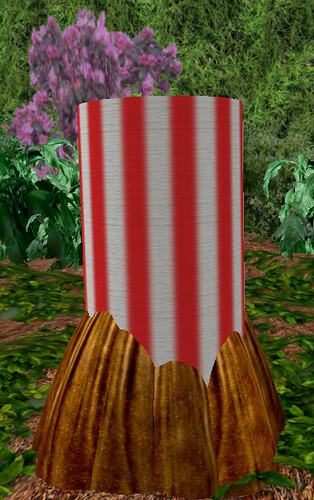
Introducing my dressing booth. Want to make your own? It is a 2 m tall cylinder with a 1 m X and Y size. Texture it however you'd like. Attach to spine. Or if you are not a builder, see the bottom of this post for how to get one, free of charge.

Dressing Booth01
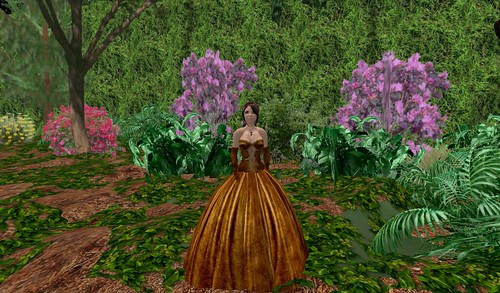
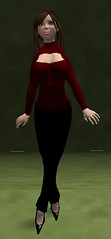
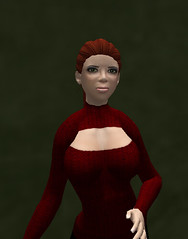
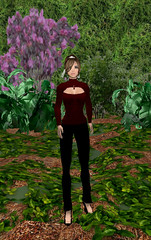
Here is Viv Perrin, our loveable EduCube photographer (with her awesome Windlight), and I suppose she should also be called "model" because she's in more pictures than I am. Hi Viv. Everybody wave.

Viv is going to change her clothes for you. But before you get all excited, reread the title of this post.

Dressing Booth02
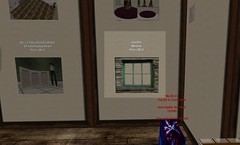
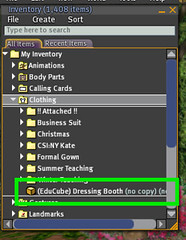
The first thing that Viv wants to do is locate her Dressing Booth in her inventory, right-click it, and choose Wear.

Now you won't be able to see Viv anymore. And, for that matter, you won't be able to see what she's wearing, which is the point. You cannot tell if she is wearing nothing or anything or just the Dressing Booth. And you cannot get ARed for being a non-human character, in this case "The Cylinder". So you have essentially mastered the Dressing Booth in just one step.

Dressing Booth03


But there are a few useful tricks to help keep the dressing booth in place until you are ready for it to go away.

First of all, you are limited to using your inventory to add or subtract clothing from your outfit. Trying to drag a folder onto your avatar may result in the Dressing Booth disappearing before you are ready and exposing naughty-bits in places you shouldn't be exposing them. Or ruining your big new-outfit reveal. Or any other embarrassing situation you could imagine.

Clothes all have to be handled by locating the item, right clicking, and making use of two inventory commands:

Dressing Booth04


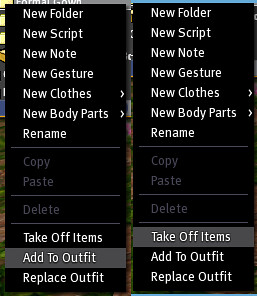
Add to Outfit puts the clothes on/replaces whatever you are currently wearing that is the same clothing layer/has the same attachment point.

Take Off Items does what it says. It removes those items from what you are currently wearing.

You can use either of these commands on whole folders. If you Add to Outfit the folder/outfit you want to wear, and Take Off Items the folder/outfit you no longer want to be wearing, you have essentially done the same thing as the "Replace Outfit"/drop a folder on your Av command. However, unlike that command, you are CERTAIN that your dressing booth will stay in place.*

* Unless you are attaching something to your spine with Add to Outfit in which case it will replace your dressing booth.

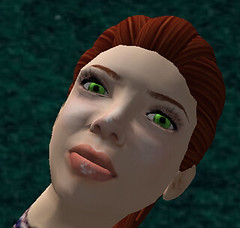
So how is Viv doing? Let's look:

Dressing Booth05


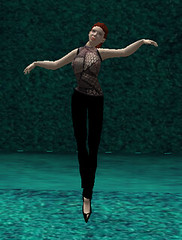
The last step is simple, detaching the Dressing Booth.

And with that, you've changed clothes in public without nudity. :)
(Click on the picture to see it in a larger size. The Dream Gardens Arboretum looks amazing.)
Dressing Booth07


How do you get an (EduCube) Dressing Booth? Well, for right now you have to IM Jasmin Loire in-world. She'll happily drop one on you the next time she is on. However, if you wait long enough she'll eventually put one in her "Freebies for Newbies" vendor.

Labels: ,


Lesson 14: Photograph Yourself

This is a timely post, happening to coincide with not one, but two forum posts asking how to do this. (And yes, I'll crosspost this link back there.)

The solution to this, doesn't really work out on a newbie budget as it requires you to have 50 L$ in the bank. So you may want to use the script buried in this post if you aren't up for all that camping/survey filling-outing.

That said, TP on over to this store and along their back wall is an object called "Lock Camera" available for 50 L$. Buy it.
Viv took the above picture using the Lock Camera object just to show that it works and keeps you from having to log in an alt.

To use your new camera lock object you first need to wear it. By default it attaches transparently to your left pec, but you really can attach it anywhere you'd like.

You have two options ... you can either activate the enclosed gesture (and deactivate all the default "Dance..." gestures (because they'll interfere) or you can type a chat command.

The first step is to put your camera into the position you are going to want to take your photo in. Focus on the background. Set up your shot. Disregard where your av is.

Then it is time to lock your camera. Either press [F10] if you are using the gesture or type "/311 cam" (without the "s) if not. Your camera will lock in position and let you know by issuing a line of chat that only you can hear, confirming your camera lock.

After that, the movement keys will reposition your avatar to wherever you'd like.

But let's say that now that your av is positioned, you don't like the shot? You can use [ALT] and the mouse to reposition your camera independent of your avatar's movement keys. Cool, huh?

Well worth every Linden. WELL WORTH.


From the Desk of Viv Perrin

If you are using Windlight, I have the sun settings set to 8:30 am in this picture. I find that gives me the best lighting. That and having an av wear a facelight.

Labels:


Lesson 13: Unique Dancing for 0 L$

Let's say that you are at a club or a dance party. There is a dance machine/ball/something that everyone has clicked on and they are all doing the same dance at the same time looking pretty much ... well ... the same.

And if you are one of them, you may be okay with being the same.

But let's say you wanted to be different. Guaranteed, at least one person in the venue is wearing a Chim (a Chimera) which is a transparent sphere dance machine that others can join in on.


Press [CTRL] + [ALT] + [T] to make everything transparent turn red. Look for avs who suddenly have hazy red spheres on their heads or backsides. Click one of those hazy red spheres. Agree to let the chim animate you. Press [CTRL] + [ALT] + [T] again to turn transparent back to ... well ... transparent.


That's it. You now stand out from the crowd.

To stop dancing, type "/99 stop" into chat (without the quotation marks).

Just a quickie tip :)
Where's the Chimera?

Labels:


Lesson 11: How to Make a Photo-sourced Seamless Texture in GIMP

== Step 1 ==
Start with the photo that contains your ideal texture. There are a lot of places where you can get photos to use, but my absolute favorite is Flickr Creative Commons. Of course, it goes without saying that you download the photo. Duh.

But for our purposes here, I'm just going to use one of the photos that comes standard with Windows (XP = My Documents > My Pictures > Sample Pictures, Vista = Public > Public Pictures > Sample Pictures).


== Step 2 ==
Open GIMP. Don't have GIMP yet? What are you waiting for? See my wreath prim-reduction tutorial for details on how to get GIMP.

In order to open GIMP, right click on your image that you've saved to your hard drive, and select “Edit with GIMP”.


== Step 3 ==
Select the area you wish to make seamless. In your main GIMP window, click on your rectangle select tool. Then, down below in the individual tools option, check next to “Fixed”, choose “Aspect Ratio” from the drop-down list, and type in “1:1”. It is important when creating a Second Life seamless image to have it be a perfect square and this will force you to use a perfect square.

Then select a portion of your image that you wish to turn into the texture. The remainder of your image will be cropped away later, so keep that in mind.

== Step 4 ==
In order to crop down to the part we want, go to Image > Crop to Selection. Now all that should be left is your square (surrounded by the marching ants) and your sanity. Leave the marching ants.


== Step 5 ==
Now we get to make it tile. Go to Filters > Map > Make Seamless and click on it. Some moments later, the image will be rendered as an image that can seamlessly tile. If you want to make other textures from this one photo, play around with the other options under Filters > Map. Some are pretty cool.


== Step 6 ==
Our last step is to save this in a format that will upload well to Second Life. Recommended file format is “.tga”. Go to File > Save AS. Then when the next screen pops up, choose wear to save it and call it “Something.tga”. You have to type in the extension or else GIMP saves it in a format of its own choosing, which does not play nice with Second Life.

Now just go to Second Life and upload. That was easy!


As always, tips and blog post recommendations are greatly accepted, however Olivia **** (last name omitted for privacy reasons) has already paid me to post this tutorial for her. Yes, you, too, can have a post created just for you. Drop a comment here, or IM Jasmin Loire in-world with what you'd like to know. I'll tell you whether or not I know enough to help you out.

For now, this is -= Jasmin Loire =- signing off! Have a splendorous week. My real life students come back to school this week, so I know that I will be!

Labels:


Lesson 10: Alpha Layer Transparency in GIMP

Materials Needed
- The GIMP
- 10 L$

What is The GIMP?
The GIMP is an image-manipulation program similar to Adobe's Photoshop, but it is free, open source, and much easier to use when creating alpha textures.

Can I learn in world?
Yes. I highly recommend the tutorial located here (you will need to click on "Classes/Seminar" to teleport). I did not make this tutorial, but found it and thought that I would link to it to augment my tutorial.

How To
1. [Image] Click on "File" and select "New".
2. [Image] You can choose whatever size/template you want for your image, but the most important thing is to expand (by clicking on the plus sign) the "Advanced Options".
3. [Image] Make sure that the background is set to "Transparency". This might require you to click on the drop-down arrow in order to choose this setting. Your new image will have a checkerboard background. This is good, the checkerboard indicates everything that will have a transparent portion.
4. [Image] Create your image that requires a transparent portion. As you can see, I chose to make an ornate window. You can get a copy of my GIMP-created window here. The base image that I used came from Flickr Creative Commons. Thanks Frazerweb.
5. [Image] Now is the hard part: saving properly. Go to File > Save As. In that window, you are going to type in the name of your file. I'll call mine "Window.tga". The most important thing to remember is to type in the ".tga" part. Also, make sure that you accept whatever pre-sets it asks of you with regard to saving.
6. Open Second Life and click [Ctrl] + [U]. This is where your 10 L$ is going to come in.
7. [Image] Navigate to where you saved your image and upload it. Notice in the preview that all of the transparent parts are still transparent (as indicated by the checkerboard pattern).

Ta da! That's it. Not too hard was it? If this was helpful to you, please remember that tips are happily accepted. Just tip the japanese-style donation box (called a saisenbako).


gimp7Also, if you've gone to all the trouble to download my window gimp file, why not just save yourself the time it would take to size the window correctly and just head over to the EduCube Headquarters where you can buy an already uploaded/scaled correctly window object for the same price you would pay to upload your own texture.

Labels:


Lesson 7: Using The Gimp to Reduce Your Wreath's Prim Counts (Part 2)

Part 1

Step 5: Right Sizing in Second Life
We want to ensure that when we go to load our wreath back into Second Life that it will not be squashed or stretched in any direction. There is a really neat trick to make sure it looks the same in Second Life as it does right now.

Go to Image > Canvas Size.


On a piece of paper/back of your hand/your sleeping roommate's forehead, copy down the numbers listed for width and height. Then click "Cancel". We don't want to change anything on this screen, just get information.


We will come back to this later.

Step 6: Saving Properly
Go to File > Save As (why "As"? because you are already using a pre-made file and it will just save over your snapshot unless you do something different) and name it "wreath.tga". Now click Save and agree to whatever pre-sets it asks you to agree to.


That's it. That's all you have to do to save transparency in Gimp. You can now laugh at your friends who are using Photoshop and freaking out at something called an "Alpha Layer". You don't have to mess with that. Win for you!

Step 7: Uploading and Creating Your One-Prim Wreath
Open up Second Life. Press [Ctrl] + [U] to upload an image. This is where your 10 L$ comes in, so you need to have it if you want to pass this step.

Browse over to wherever you saved "wreath.tga" and select it. This will now give you a preview window that looks something like this:


Look at how squashed it looks. No matter, we'll fix that shortly. Feel free to re-name the image whatever you want and then click "Upload (L$ 10)". Bye-bye hard earned L$!

By the way, for those of you wondering how Linden Lab makes their money, they make some of it off of upload fees such as this. So don't consider it a fee to be avoided, but a "Thank you" for the ability to play Second Life at all.

Now, rez a cube. "How?" you ask. Rewind your brain back to the rezzing of the cubes that we did during our class to build the multi-prim wreath to begin with. Or you can watch this YouTube video ( http://tinyurl.com/2tgngn).

Texture all of the sides in "Transparent". Select-Texture the front side with your wreath. I've already put my wreath into mostly-position for this picture, but here is what I've got:


Now comes the tricky part: getting the sizing right. Retrieve the written figures from Step 5 and click on the Object tab for your wreath prim. Set the Y-Size value to match the "width" and the Z-Size value to match the height. Except, rather than inputting the numbers as ###, which is how The Gimp gave them to you, you input them as #.##. Perhaps this picture will make that clear:


Now, aside from the fact that you might need to change your width to being on the X-Size instead (you'll know if you need to do it), you are finished.

See, now wasn't that easy?

Labels:


Lesson 6: Remove that Just Rezzed Look (Part 3)

Part 1 | Part 2

Hair
As much as I like the hair pictured in FabFree's image, I really didn't want to spend more time sitting in a camping chair to earn another 1 L$ (my usual ATM was broken). Enter Shopping Sherpa's blog entry on Bewitched which appeared to promise freebie hair at quality styles. So, off I go to Bewitched!

I arrived to find that while there was a whole wall of free hair, it required camping for 120 minutes. I plopped myself down in a chair to camp for my hair, not quite realizing that I was camping for 2 hours, whereas I could have camped for only 5-8 minutes and purchased hair from Gurl 6. Ah well, live and learn.

Not one to quit part way, I continued to sit in that chair for the full two hours (while I wrote Part 1, 2, and 3 of this entry).

I dropped by Gurl 6 anyway and, since I'd already been seated for 120 minutes the additional 5 minutes were a drop in the ocean, I picked up the clearly marked freebie hair.

Viv Perrin makeover complete Armed with my new hair, it was back to the photo booth where I took my final makeover picture. (Check out my alternative hair.) You'll notice that I solved my naughty-bits problem. What am I going to do with that top? I'm going to give it away to the first person who IMs me (Viv Perrin) in world. Ready? Set. Go!

Total Costs:

L$ = 1 - 2 (depending on whether or not you go for the Gurl 6 hair)
Hours Devoted = 2.5
Extra Freebies Discovered = 6
Compliments Received = 3
Photos Taken and Edited = 17

-------

There are, of course, other sites to find freebies besides going all over the place. Some freebie collections are located at the following:

free_dove_1The Free Dove which has sooooooooo many clothes and shoes, and also a wall entirely devoted to hair. There are some gift certificates there for designer hair, rather than reduced-quality freebie hair.
the_free_dove_2


GNUbiesGNUbie Store which has dollarbies, the pictured six skin pack (though selection changes often so it might not be there), and large amounts of high quality skins and hair. GNUbies is less organized than The Free Dove, but tends to have a higher quality of product.

------------

Viv's latest wishlist item: LanieWear Photo Background to make it easier to take pictures for you. Grateful enough that you'd like to help me achieve that goal? Consider this my virtual tip jar:

Search People for "Viv Perrin". Click on the "Pay" button. Send me whatever tip you think I deserve. When I have 35 L$, I will buy the photo background and do another style make-over entry, this one for the gents.

Labels:


Lesson 7: Using The Gimp to Reduce Your Wreath's Prim Counts (Part 1)


Step 1: The Necessary Tools
In order to follow these instructions, you are going to need a very specific tool set. You will need (in no particular order):
  • The Gimp image editor
  • 10 L$
  • Your snapshot of your wreath.


Getting The Gimp
In order to get The Gimp, please point your web browser (your real one, not the dinky one they give you inside of Second Life) over to - http://www.gimp.org (or just do a Google search for “The Gimp” and take the first link).


There, you will see a screen like this one. Click on the “Download” button and download, and install The Gimp. It is free and works on Windows, Linux, and Mac OS everything.

Why did I pick The Gimp? For one, because it is free, and runs on all operating systems, which means that if you can read this tutorial, you can use it. For a second, because creating a transparent texture is super-easy in The Gimp.

Getting 10 L$
The easiest way to get 10 L$ is to convert some real money to L$. Failing that, you can always use the techniques written here. Or, for those of you reading this tutorial in-world on my rather awesome book: http://tinyurl.com/39xw2v

Step 2: Cropping Your Image to the Wreath
Open up The Gimp. To go File > Open and select your snapshot that is located somewhere on your hard drive (you do remember where you save your snapshots, right?). This should load your snapshot in a new window.

Click back over to your main Gimp window and select the square selection tool (the upper left-hand button). Then return to your snapshot and draw a square around your wreath. Don't worry, we'll make this tighter later. For now, you are just getting rid of excess blank white space.


Now, on your image window, click on Image > Crop to Selection to crop your snapshot down to just the selection. As I said before, we aren't worrying about being perfect at this stage, since we have a later cleanup stage yet to go.


Step 3: Turning the White into Transparent
We are now going to use your third Gimp window, the one with the layers. On that window, please click on the "Copy Layer" button. It is two to the left of the trash can button (or you can just look at which button is circled on the image.

This will give you a new layer (those things listed above the buttons) called Background Copy. This is good.

Now click on the "Background" layer (the one on the bottom) and then click on the Trash can button. We cannot do transparent on the "Background" layer, but we can on the "Background Copy" layer, which is all that we should be left with.

Back over to the main Gimp window now. You are going to chose the "Select By Color" tool, which looks like a finger pointing to a red square with a blue and green square also available. It is the top row, fifth from the left.

Once that has been selected, click over to our snapshot window where you are going to click on the white. Where? Anywhere, so long as it is white. This will result in a lot of select-dashes appearing all over your image. Are they outlining all of the white? Good!


Now, and this is the hard part, you are going to press the [Delete] key. If, for some reason you mess up at this or any other stage (though this is the stage where you will notice a mess-up) you can always press [Ctrl] + [Z] and go back a step. Your image should now have a checkerboard background (which is how The Gimp indicates transparency):


Step 4: Getting Rid of the Empty Space
Still on the image window, go to Select > Select None to get rid of your selection-dashes. Then head over to Image > Autocrop Image which will tighten your image down to just the bare minimum. We like this.


You should now have a much tighter image.


Continue on to Step 5.

Labels:


Lesson 6: Remove that Just Rezzed Look (Part 2)

Part 1

Skin
User created skins can run anywhere from 500 L$ to 1000 L$ if not more. I headed over to Tuli since FabFree had gone to all the trouble of matching a skin to a shape. I'm just that pale white normally (my students encourage me to get some sun), so this skin a definite win.

The first thing that I notice when I arrive, is the presence of a Christmas tree that is surrounded by presents. There is no hovering text that encourages me to click on the presents, but I click nonetheless. And almost all of the presents contain, well, presents. There was only one empty box. Most of the presents were lovely pieces of clothing but one of them was the S4 Cream skin. My quest to find where they hid the freebie skin is over before it had even begun. Back to the photo studio!

Viv Perrin modeling S4 Cream Skin by TuliHere is my new look, bedecked in my new skin (along with the new shape). Oh, and I found a solution to my previous top, that came in the form of a present freebie from Tuli: a new sweater. This one is red and sassy enough to show some chest, but no cleavage. This is actually something I'd wear to teach in a real classroom. There are additional prim cuffs and a turtleneck, but I actually like the sweater more without them.

But Houston, we have a problem. If you look at the image from FabFree and the picture above, you will see that the face does not look the same. The whole reason I went through all of this trouble to go to the links and find specifically that shape and specifically that skin was because I really wanted that face. After some serious searching, I discovered that my viewer, Windlight, was the problem. Hopefully they'll fix the lighting situation. In the mean time, I created a facelight and placed it on myself. I do not have to go into detail about how to create a facelight because you, being an educator and not a game or software developer, have the real viewer, not a "first look" (meaning still in the stages of being untested) viewer. Here is how it turned out:
Viv Perrin modeling S4 Cream Skin by Tuli


Much better.

-------

Tune in next time for our final installment: Hair!

Labels:


Lesson 6: Remove That Just-Rezzed Look (Part 1)

One of the tell-tale signs that someone is a newbie in Second Life is their skin and their hair. The default skins, while serviceable, are low quality and almost all of the long-time SL users upgrade to user-created skins. Hair is a similar case.

My just-rezzed look is better than most, because I went through the CSI:NY avatar creation system (more on that tomorrow). However, even it isn't perfect, so it is off to solve all problems.

I attended an NCI (New Citizens I...?) class during one of my first days in Second Life and they did a show on avatar personalization. Their advice was to start first with a shape, then get a skin, hair, and finally new clothes.

I did a bit of fashion-blog shopping to see if I could find an avatar I wanted to adopt and I found one. The face shape was awesome (I naturally have an oval face), the body seemed proportional, and the makeup was not overwhelming. And so, armed with the links that the site provided, I set off to acquire all parts of that avatar and make them mine.

A side note, check out the rest of the site for other completely-from-free-or-dollarbies avatars. Ignore the clothing, because after all, we are going to dress like the professionals we are, but look at face shapes and skin realism. Perhaps you can find the upgrade you are looking for on that blog, which will save you a lot of time guessing and checking.

Another problem I hope to solve along the way is the fact that under my crocheted top, some hints of pink are showing. This is due to the fact that the default skin from CSI:NY has those naughty-bits. Newbie skins created through Linden Lab do not suffer from the same problem. However, one thing to keep in mind is that skins you are going to pick up later along the way may come complete with photorealistic naughty-bits. This is because artists wish to be truthful to their medium ... or something.

Shape
Following the directions given to me by the NCI class, I first went out to acquire my new shape. I was excited about getting a new shape, since I felt that my default shape was a bit forehead-heavy (though otherwise functional).

I headed over to Style Your Destiny where many surprises were in store for me. For one, they have a garbage can that encourages you to go dumpster diving. If you do so, you get a sweet freebie. I scored a necklace pack, which is great because I was just thinking that I didn't have any jewelry, and with my hair in a ponytail, I needed something to frame my face.

Another surprise was the freebie-pack that was located on the outside of the store, across from the talking garbage can. It contained, amongst other things, a free pair of panties. Yay, the starts of my underwear collection!

I also noticed that Style Your Life was one of the few places in Second Life that I've encountered that acknowledges Hanukkah. You cannot know how happy this makes me. Truly happy. (^_^)

I head up the stairs and turn to my right where I find a vendor located next to another freebie package. This vendor does not announce prices, nor do I see anything that says Eve, but wouldn't you know that as I click through the selection on the vendor, there Eve is! And I can buy her for the 1 L$ that was advertised on the FabFree blog.

I neglect to pick up the eyes that FabFree used because my default eyes seem natural enough to me (I'm bright-green eyed in person) so I figure that I'll use these for now. I may yet return to pick up those eyes at a later date.

I also noticed that for your male avatars, they have 1 L$ shapes as well. Remember, you are receiving a shape, and not the skin, so if your skin is as pale white as mine (indicating that you, like myself, need to get offline and out into that vitamin-D inducing sunshine), these shapes, coupled with the right skins, will make you look like yourself, only more in shape.

Viv Perrin modeling Eve Eyes from Style Your DestinyViv Perrin wearing Eve Shape by Style Your DestinyHere I am wearing the Eve shape. The first thing I noticed was that my chest problem has grown. I'm also shorter, and my forehead isn't as forehead-dy. This shape came with its own set of eyes, so I took a closeup picture of myself modeling the eyes. Extreme closeup.

-----

Tune in next time for the second installment: Skin!

Labels:


Lesson 5: How to Unpack a Box

A lot of items in Second Life come packed in boxes. In order to get the merchandise out of the box, however, it requires a somewhat complicated procedure. But fear not, through this lesson we will discover that unpacking boxes is easy.

boxFirst, find the Item in your "Objects" Folder in your Inventory. Then, drag the box to the floor near where you are standing, provided you are standing somewhere that you are allowed to build. If you need to go somewhere that will allow you to unpack boxes, I highly recommend clicking on the search tab and doing a "Place" search for the word sandbox. I'd link to some here, but on any given day different ones are up/down so my links might not be the most reliable.

box2Once you have rezzed the object (made the box appear on the land), you can work with it to open it. Right-click on the box. Select the "Open" button. After doing this, the list of objects inside the item will appear. You can now drag the items into your inventory.

box3


I hope this helps :) any other questions please IM Me :)

Lady Greenstein
AFK Designs

Labels: